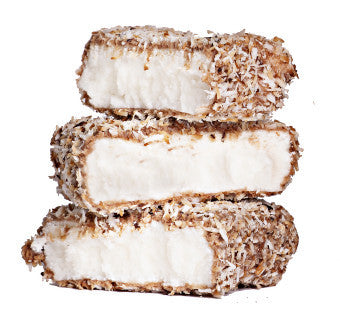
A present for our customers – Scottish Potato Macaroon

As you all know we had to sadly remove our handmade traditional Potato Macaroon from the products we offer just because we were running out of time trying to keep up with the demand for fudge. This caused way more upset than we ever expected but alas we sold our big mixer so to try and make up for it we wanted to share our recipe with you.
Now before I start I’m going to manage your expectations here just a little. You see, if you need exact measurements for all your ingredients then you are going to be sorely disappointed with the rest of what we are about to say. Making proper old fashioned Macaroon isn’t about precise measurements its about knowing and understanding what is happening with your ingredients so that you tell when its right by sight, touch, smell and very importantly taste. We will do our very best to describe it to you. It’s all about the potato you select and the amount of starch it has in it that then dictates the volume of icing sugar required to make your macaroon. We always found Kestral potatoes did the job but an Albert Bartlett Red Rooster will also make grand macaroon!
You’ll need;
One Potato
Icing Sugar (More than you’d imagine!)
Vanilla Extract
Lemon Juice
Chocolate (Good quality)
Dessicated Coconut
1. Peel your potato and boil it until its soft. DON’T ADD SALT!!!
2. Whilst the potato is boiling spread your coconut evenly onto a baking tray and put it into the oven on a low heat. Keep checking it whilst its in the oven as coconut can burn really quickly. When the coconut is a lovely toasted brown colour remove it from the oven and set it aside to cool.
3. Drain your potato and pop it into a mixer and break it down using a K Hook on a slow / slowest setting until it is properly mushy with no lumps. This may take a good 5 minutes.
4. Add a touch of Vanilla Extract (not essence) probably about half teaspoon if that.
5. Add the same amount in lemon juice and keep the mixer going for about another 2 / 3 minutes and the potato should now be like a thick smooth paste.
6. Now you are ready to add your icing sugar. You want to add it little by little and as the mixer is moving. Within a few heaped tablespoons of icing sugar being dropped into the mixer your mixture in the bowl will look a thick white soup and won’t even vaguely resemble macaroon. BUT DON’T PANIC! Keep faithfully adding icing sugar and even when you finish one bag of icing sugar and open up the next bag of icing sugar whilst thinking “this can’t be right??” keep going. You’ll start to see the mixture come back together.
7. Keep adding Icing Sugar until you start to get a stiff mixture that almost resembles a less sticky version of bread dough. When the mixture is thick enough it can be rolled into a ball and lifted out the bowl then dust your work surface with icing sugar to prevent the mixture from sticking and pop your dough into it.
 This is where the hardwork begins!!
8. Just before you go any further take a baking tray (probably about 5″ x 6″ with 1/2 – 3/4″ high sides and line it with parchment.
9. Dust your ball of dough and then start to knead it like you would bread dough. Now this is where you really work for your treat because the more you knead it the better the texture of the macaroon will be. There is no great secret to this part its just quite hard work. You need to work the mixture hard for at least 4 / 5 minutes.

10. Once you have a lovely smooth ball of dough roll it out roughly to the size of the tray you have and pop it in.
11. Now stick it in the fridge for at least 3 – 4 hours but if you can, try and leave it overnight.
12. Melt some really good quality chocolate in a bain marie.
13. Remove the slab of macaroon from the tray and cut it into pieces. You can cut it either into bars, bite sized pieces or whichever you’d prefer.
14. Pop your toasted macaroon onto a plate and pop it next to your bowl of melted chocolate cos now this is where it gets messy!
15. Take your macaroon dip it in the chocolate and try and get it completely covered. Shake off any excess chocolate and then dip the chocolate into the toasted coconut and roll to ensure its evenly coated in coconut and then aside and repeat until all pieces are covered.
16. Pop all the pieces in the fridge and leave them for at least 2 hours and then eat!
If you have any questions about our recipe then just give us a shout at susan@ochilfudgepantry.co.uk and we’ll do our best to help you! This recipe is given freely to our customers and isn’t intended as a new product line for any other small confectionery business….let’s all be a bit more inventive.
If you are a blogger or writer we are happy to share this information freely with you but we’d really appreciate the courtesy and respect of acknowledgement.


